


Import Wholesales Decorative Cast Iron Wall Shelf Bracket Ornate Vine Rust Brown 13.5" Deep

 4.9 (82 items)
 Limited Time Sale
$15.30 cheaper than the new price!!
Free cash-on-delivery fees for purchases over $99
Product details
| Management number | 218799654 | Release Date | 2026/05/03 | List Price | $10.20 | Model Number | 218799654 | ||
|---|---|---|---|---|---|---|---|---|---|
| Category | |||||||||
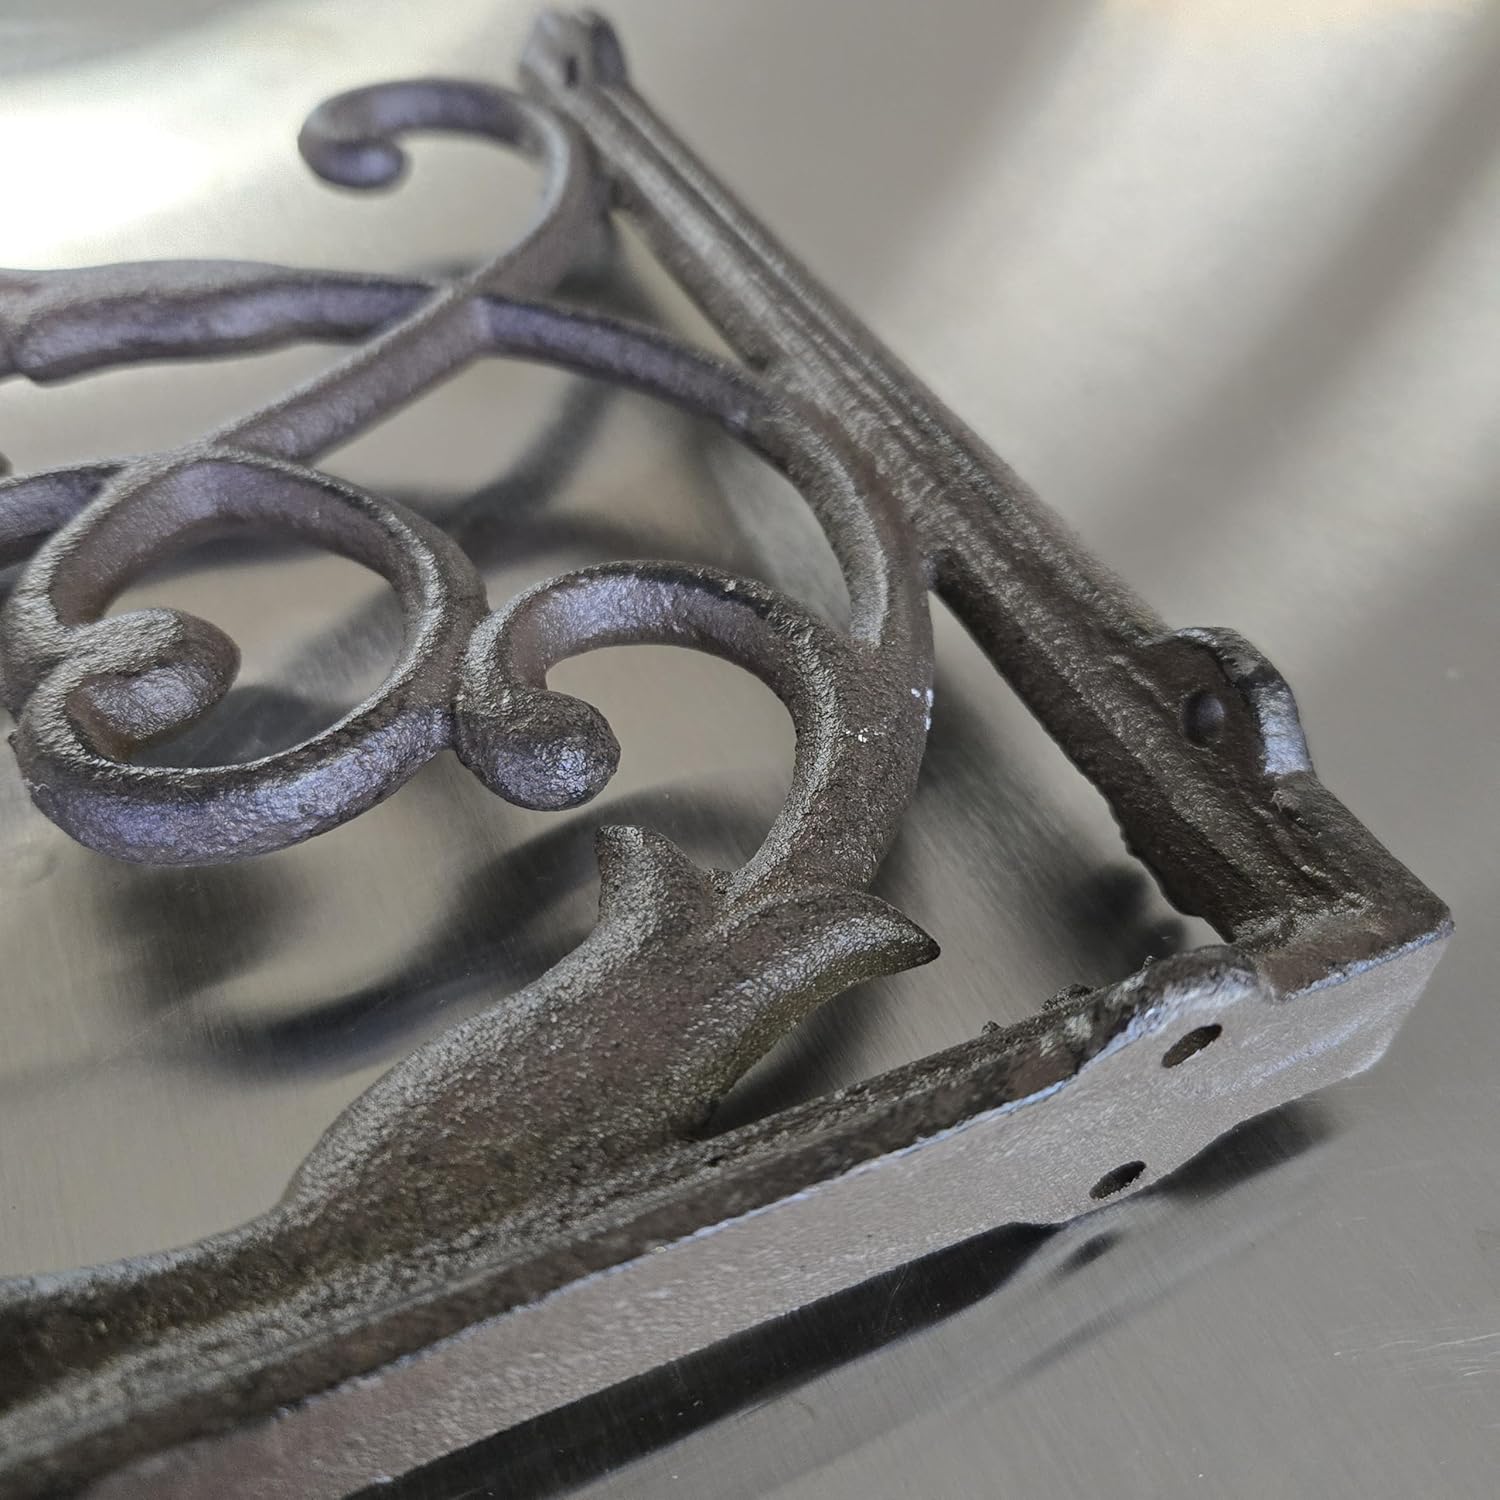
Large 13.5" Deep Ornate Wrought Iron Shelf Bracket - Decorative Corner Support Add a touch of elegance to your home decor with this beautifully crafted ornate wrought iron shelf bracket. Made from durable metal, this decorative corner support features a unique scrollwork design with curved lines and pointed leaves. Perfect for holding shelves, plants, or decorative items, this bracket is easy to install and adds a rustic charm to any room. Key features include: Ornate wrought iron design Decorative corner support Durable metal construction Easy to install Perfect for shelves, plants, or decorative items
- Single 13.5" Deep Shelf Bracket With Ornate Vine pattern
- Sturdy Cast Iron Design With Distressed Brown Color For Rustic Vintage Look
- Fun DIY Shelf Crafting Project
- Combine Shelf Brackets To Make Shelves The Specific Length You Desire
| UPC | 682384839935 |
|---|---|
| Size | Large |
| Color | Distressed Brown |
| Shape | Rectangular |
| Room Type | Bedroom, Hallway, Living Room |
| Brand Name | FLAG EMOTES |
| Item Depth | 13.5 inches |
| Model Name | SBR0009 |
| Shelf Type | Bracket Shelf |
| Style Name | Rustic |
| Unit Count | 1.0 Count |
| Item Weight | 3 Pounds |
| Finish Types | Distressed Brown |
| Manufacturer | FLAG EMOTES |
| Model Number | SBR0009 |
| Product Name | Wall Mounted Shelf |
| Material Type | Cast Iron |
| Mounting Type | Wall Mount |
| Item Dimensions | 13.5 x 1.25 x 9 inches |
| Number of Items | 1 |
| Shelf Thickness | 13.5 Inches |
| Furniture Finish | Brown, Distressed |
| Installation Type | Wall Mount |
| Number Of Shelves | 1 |
| Required Assembly | Yes |
| Additional Features | Lightweight, Space Saving |
| Age Range Description | Adult |
| Manufacturer Part Number | SBR0009 |
| Product Care Instructions | Wipe with Dry Cloth |
| Specific Uses For Product | Shelf |
| Minimum Required Door Width | 13.5 Inches |
| Recommended Uses For Product | shelf, mailbox mount, decoration |
| Assembly Instructions Description | Step 1: Identify the wall anchor points. Step 2: Attach the bracket to the wall using the provided hardware. Step 3: Ensure the bracket is securely fastened. |
Decorative Bookends


Brackets


Correction of product information
If you notice any omissions or errors in the product information on this page, please use the correction request form below.
Correction Request Form